Rotorua Geothermal Parks in 2 Days: Wai-O-Tapu, Waimangu, Hell's Gate and Orakei Korako
Rotorua sits inside the Taupō volcanic zone, and within an hour’s drive of town there are more geothermal parks than most visitors have time to see. The temptation is to book all four and cram them into a single exhausting loop, which usually means walking past your third boardwalk of coloured pools wondering why it looks like the last one. This itinerary avoids that by pairing parks that don’t overlap: a day of coloured surface features followed by a day built around a boat crossing and a mud bath. Full details on each site are in the guide to choosing between Rotorua’s geothermal parks; this page is about the order to see them in.
Why the order matters more than the list
Four parks sound like four versions of the same thing: steam, sulphur, coloured water. In practice they differ in format as much as in scenery. Wai-O-Tapu is a signposted walking loop past static pools and a timed geyser. Waimangu Volcanic Valley is a one-way downhill walk through the youngest hydrothermal system on the planet, born in a single night in 1886. Orakei Korako can only be reached by a short boat trip, which changes the pace of the whole visit. Hell’s Gate is the one park built around getting into the geothermal mud rather than just looking at it.
Grouped by geography and by format, two days split naturally: Wai-O-Tapu and Waimangu share the same road south of town and both reward a full walking visit, so they go together on day one. Orakei Korako and Hell’s Gate don’t share a road, but they share a role: Orakei Korako is the morning’s main event, and Hell’s Gate’s mud bath is the kind of thing you want at the end of a day, not the start.
| Park | When | What makes it different from the others |
|---|---|---|
| Wai-O-Tapu | Day 1, morning | Coloured surface pools (Champagne Pool) and the Lady Knox Geyser, triggered daily |
| Waimangu Volcanic Valley | Day 1, afternoon | Walk-through valley formed by a single 1886 eruption; option to finish by boat |
| Orakei Korako | Day 2, morning | The only one of the four reached by boat, giving it a more remote feel |
| Hell’s Gate | Day 2, afternoon | The most active of the four, and the only one with a mud bath you get into |
Accessibility varies more than the shared “boardwalk” description suggests. Wai-O-Tapu’s main loop and Waimangu’s descending path are both formed, sealed surfaces manageable with a wheelchair or pushchair, though Waimangu’s return leg from the valley floor is a genuine climb unless you take the shuttle back up. Orakei Korako removes that option entirely: the boat crossing is the only way in, and boarding depends on the operator’s own equipment rather than anything you can arrange yourself. Hell’s Gate sits somewhere in between, with formed paths to the viewing points but a mud bath that is, by definition, not step-free. The Rotorua accessibility guide is worth checking against each park’s own site before booking, rather than assuming the four are equivalent.
Day 1: Wai-O-Tapu and Waimangu Volcanic Valley
Both parks sit south of Rotorua on SH5, roughly half an hour’s drive from town for Wai-O-Tapu and a short distance further to Waimangu, which makes them easy to chain in one direction without doubling back.
Morning: Wai-O-Tapu
Arrive early enough to walk the main loop at a comfortable pace before the Lady Knox Geyser display, which is triggered once a day, mid-morning, with a natural surfactant rather than erupting on its own. Times can shift, so it is worth checking with the park directly on the day. The loop itself takes you past the Champagne Pool, with its orange mineral rim, and the Devil’s Bath, a bright sulphur-green pool that photographs better in overcast light than full sun. Full logistics, including how the geyser trigger actually works, are in the Wai-O-Tapu visiting guide.
a standalone entry ticket for Wai-O-Tapu covers this stop if you’re driving yourselves and don’t need a guide.
One thing worth knowing before you go: Lady Knox doesn’t erupt on its own, it’s cued with a surfactant poured in by a park guide, and that’s disclosed openly rather than staged as a surprise. It still draws a real crowd, since coach tours are typically timed to arrive just before the display, so the viewing area can feel more like a queue for ten minutes than the quiet walk the rest of the loop offers. If that’s not the atmosphere you’re after, walking the rest of the park first and circling back once the coaches have moved on tends to work better than joining the crowd at the geyser itself. The Champagne Pool and Devil’s Bath are usually far less crowded either side of that window.
Afternoon: Waimangu Volcanic Valley
Drive on to Waimangu, a few minutes further along the same road. Where Wai-O-Tapu is a loop, Waimangu is a one-way walk downhill through a valley that didn’t exist before the eruption of the nearby Tarawera mountain range on 10 June 1886 — it’s the only geothermal system in the world with a documented birth date. The path passes Frying Pan Lake, reckoned to be the largest hot spring of its kind, and Inferno Crater, a crater lake with a colour that shifts through its own cycle. Most visitors walk down and either walk back up or catch a shuttle; some extend the visit with a short boat leg on Lake Rotomahana at the bottom of the valley.
If you’d rather be on the water than on foot for part of the afternoon, a guided kayak tour along Waimangu’s steaming cliffs covers the lake section from a different angle than the standard walk-and-shuttle visit.
Back in Rotorua for the evening, this is a reasonable point to eat somewhere in town and rest; see the Rotorua food and drink guide if you haven’t settled on where to stay. For where to base yourself for both nights, the Rotorua accommodation guide covers the practical options.
Day 2: Orakei Korako and Hell’s Gate
Day two goes in the opposite direction and at a different pace. Orakei Korako sits roughly on the way toward Taupō, so the drive takes about as long as heading to Taupō itself, while Hell’s Gate is northeast of Rotorua on SH30 — the two aren’t on the same road, which is why this day is built around one long morning stop and one shorter afternoon stop rather than a loop.
Morning: Orakei Korako
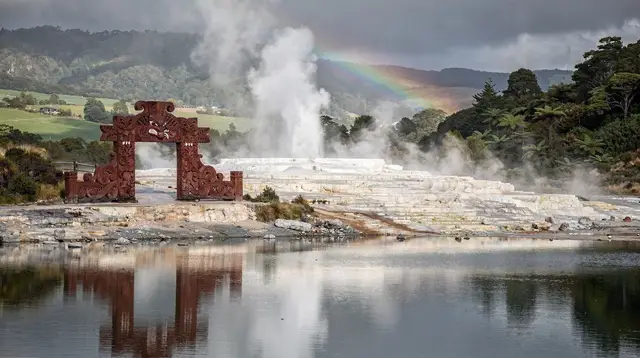
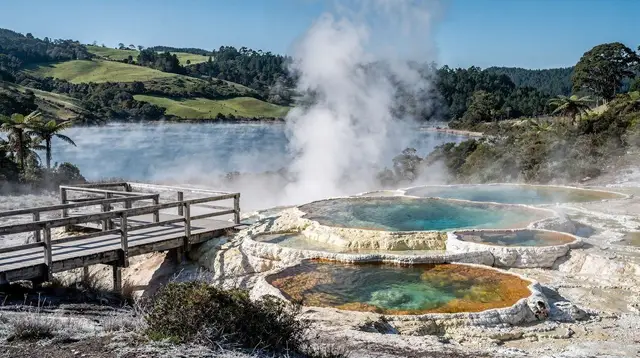
Orakei Korako is nicknamed “the hidden valley” for a reason: the only way in is a short boat crossing, arranged through the park itself rather than something you drive up to directly. That crossing changes the character of the visit before you’ve even set foot on the boardwalks — it tends to filter out the crowds you’d find at a roadside park, so allow a proper block of the morning rather than treating it as a quick stop on the way to somewhere else. The boardwalks wind past silica terraces and geothermal pools in a setting that feels noticeably quieter than Wai-O-Tapu the day before, which is the point of putting it here rather than back-to-back with day one.
If two geothermal days start to feel like enough colour and steam and you’d rather see this stretch of the volcanic zone from above, a floatplane flight that lands directly at Orakei Korako is worth knowing about as an alternative way in, particularly if road access is affected by weather or works — schedules and conditions are best checked directly with the operator.
Afternoon: Hell’s Gate
Drive back through Rotorua and out the other side toward Hell’s Gate, also known as Tikitere, on SH30. This is the most geothermally active of the four parks and the only one where getting into the mud is part of the standard visit rather than an add-on. After two days of walking boardwalks and looking at pools from a respectful distance, ending here changes the register: a mud bath and hot pools are a genuine way to unwind rather than another viewing platform. It rounds the two days off as a spa afternoon instead of a fourth identical park visit. Details on how mud bathing actually works, and how it differs from a standard hot pool, are in the guide to Rotorua’s mud baths and mud pools.
a guided eco-thermal afternoon tour is a way to cover Hell’s Gate with some local context if you’d rather not just wander independently.
If you’d rather not self-drive both days
Everything above assumes a rental car, which the guide to driving in New Zealand for visitors covers if you’re not used to driving on the left. If you’d rather not manage two days of navigation and geyser timing yourself, a single guided day tour covering Wai-O-Tapu, Waimangu and Te Puia compresses the geothermal-park side of this itinerary into one day with a driver and a schedule handled for you, freeing your second day for Orakei Korako and Hell’s Gate at your own pace, or for something else entirely.
If you only have one day, not two
Some visitors read this itinerary after already committing to a single day in the region, which changes the choice considerably. Wai-O-Tapu is the safest single pick: it packs the widest range of colour and a timed geyser into one compact loop, and it’s the park most tour operators default to for that reason. Waimangu suits travellers who’d rather walk through a landscape than past a series of viewing points, and its 1886 backstory gives the visit a narrative the others don’t have.
Orakei Korako and Hell’s Gate are harder to justify alone: the boat crossing and the mud bath are both worth building a day around, but neither delivers as much variety per hour as Wai-O-Tapu does. The guide to choosing between Rotorua’s geothermal parks goes through the trade-offs in more depth, and the one-day Rotorua itinerary shows where a single geothermal stop fits alongside everything else worth doing in a day.
Practical notes for both days
Sulphur fumes, damp boardwalks and steam are part of every stop on this route, not a sign that something has gone wrong; the guide to why Rotorua smells of sulphur explains what’s actually happening underfoot. Wear closed shoes with grip, bring a hat and sunscreen even on an overcast day, since UV levels in this part of the country run high, and carry water — there’s a fair amount of walking across the two days, most of it flat but some of it, at Waimangu, downhill with a climb back out. Basic geothermal safety, including why you stay on marked paths, is covered in the Rotorua geothermal safety guide.
Budget for two adults on a mid-range trip, covering park entries, fuel or a guided tour for one day, and meals, runs in the region of 350 NZD per person per day; a tighter budget is achievable if you self-drive both days and stick to single-park entry tickets rather than combined tours. Weather rarely cancels a geothermal park visit outright — several of these sites are arguably more atmospheric in the rain, when the steam sits low and thick — but always confirm opening hours and any track closures directly with the park or the Department of Conservation before setting out, since access can change with maintenance work or weather events.
A couple more questions
What if I only have one day for geothermal parks, not two?
Wai-O-Tapu is the strongest single choice, since it fits the widest variety of features and a timed geyser into one loop without a boat crossing or a change of clothes for mud. Waimangu is the next best option if you’d rather walk through a landscape than around one.
Are Wai-O-Tapu’s crowds a problem?
Only around the Lady Knox Geyser display, when coach tours converge on the same viewing area for about ten minutes. The rest of the loop, and the park outside that window, is noticeably quieter, so timing your visit to arrive either well before or shortly after the display helps.
For a shorter version of this trip focused on one geothermal park rather than four, see the standard Rotorua 2-day itinerary, or browse the full things to do in geothermal parks category for more on each site covered here.
Geothermal park tours on GetYourGuide
Verified deep-linked GetYourGuide tours. Book through these links and we earn a small commission at no cost to you.
Photos show the destination, not the operator's own images.